웹 컴포넌트에 대해 공부하면서 커스텀 엘리먼트의 메서드 중에 attributeChangedCallback이 있었다. 커스텀 엘리먼트의 속성에 변화가 있을 때 호출 되는 메서드였다. 이 메서드의 경우에는 오로지 자기자신의 속성변화만 읽어냈기 때문에, 사용하기에 한계가 있었다. 이러한 점을 개선하기 위해서 DOM 요소의 변화를 관찰하고, 해당 요소에 변화가 있을 때 콜백을 시행하는 객체 MutationObserver가 나왔다.
- const observer = new MutationObserver(callback);
콜백 함수에 연결된 감지기 인스턴스 생성한다. - observer.observe(target, options);
요소의 변화를 감지를 시작한다. target은 DOM 트리 내에서 변경을 감지할 노드 또는 하위 트리의 노드를 작성하고, options의 경우 DOM의 변화 중 어떤 변화를 감지할 것인지를 작성한다. - observer.disconnect()
모든 관찰을 중단한다.
<!DOCTYPE html>
<html lang="en">

<head>
    <meta charset="UTF-8">
    <meta name="viewport" content="width=device-width, initial-scale=1.0">
    <title>Document</title>
    <style>
        #div1 {
            background-color: lightcoral;
            width: 100px;
            height: 100px;
        }
    </style>
</head>

<body>
    <div id="div1">
        <p id="p1"></p>
    </div>
    <button id="btn1">색상변경</button>

    <script>
        const p = document.querySelector("#p1");
        const targetNode = document.getElementById("div1");

        // MutationObserver 인스턴스 생성
        const observer = new MutationObserver((mutationRecord) => {
            console.log("변경감지됨");
            mutationRecord.forEach(mutation => {
                if (mutation.type == "childList") {
                    p.textContent = "자식 노드 변경";
                } else if (mutation.type === "attributes") {
                    p.textContent = "속성 변경";
                }
            })
        });

        // 설정한 변경의 감지 시작
        observer.observe(targetNode, { childList: true, attributes: true, attributeFilter: ['style'] });

        // 버튼 클릭 시 배경색 변경
        document.getElementById("btn1").addEventListener("click", () => {
            targetNode.style.background = "lightblue";
        });
    </script>
</body>

</html>
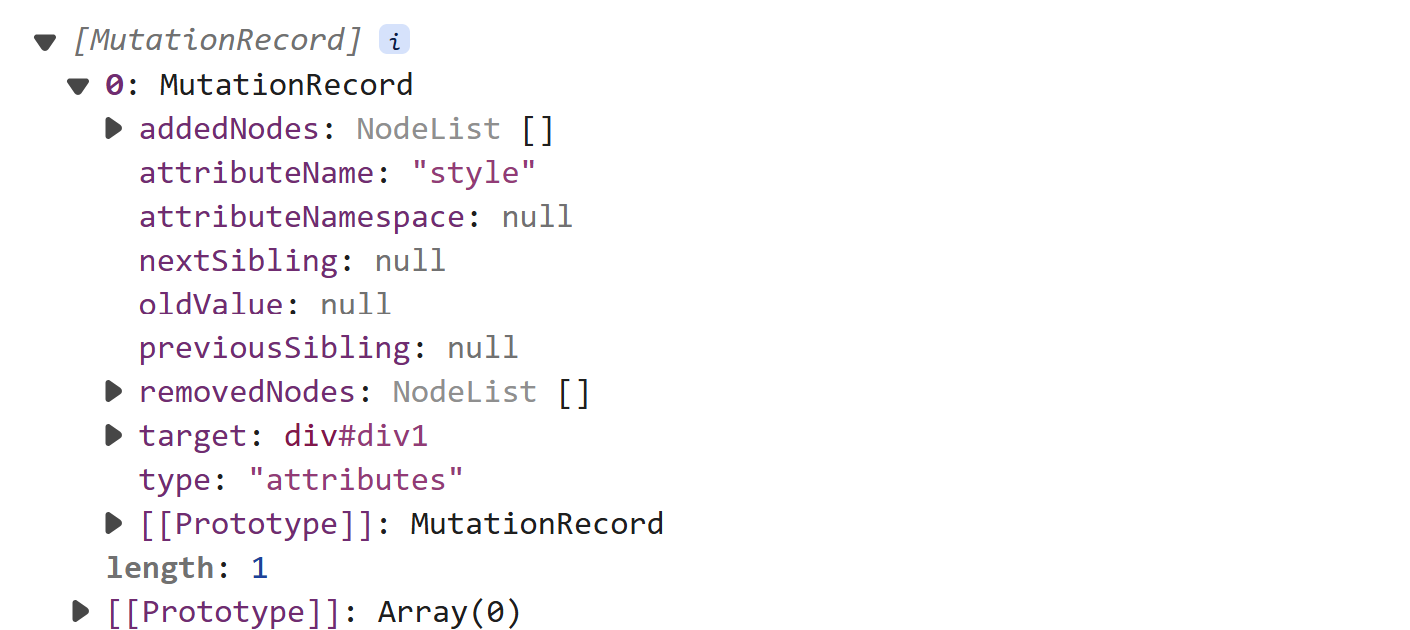
색상변경 버튼을 클릭했을 때 background속성이 변경 되면서 MutationObserver가 변화를 감지하고 그에 해당하는 콜백함수를 시행하는 모습을 볼 수 있다.

MutationObserver로 변화를 감지한 MutationRecord 객체는 다음과 같은 속성을 가지고 있다.

Options 종류
| 속성 | 설명 |
| subtree | 대상 노드(target)의 모든 하위트리에 대한 변화를 관찰한다. |
| childList | 대상 노드의 자식요소(텍스트노드를포함)가 추가되거나 제거되는 변화를 관찰한다. |
| attributes | 대상 노드의 속성변화를 관찰한다. (attributeFilter 또는 attributeOldvalue가 지정된 경우 true) |
| attributeFilter | 관찰할 속성의 배열이다. 설정하지 않으면 모든 특성의 변경을 관찰한다. |
| attributeOldValue | true로 지정하면 노드의 특성 변경을 감지했을 때 해당 특성이 변경되기 전의 값을 기록한다. |
| characterData | 대상 노드의 데이터를 관찰한다. 이 옵션은 대상 노드가 텍스트노드일때만 유효하다. |
| characterDataOldValue | characterData옵션이 true로 설정된 경우, 변경 전의 데이터를 기록한다. |
<<예제>>
웹 컴포넌트에서 attributeChangedCallback을 사용했던 예제를 MutationObserver를 사용해서 변경해보았다. MutationObserver의 경우 위에서 작성했던 것처럼, 자기자신 뿐만이 아니라 다른 DOM 트리 내의 변경을 감지할 수 있고 속성 뿐만이 아니라 하위트리, 자식요소 등의 변경이 있을 때 감지도 가능하다.
<!DOCTYPE html>
<html lang="en">
<head>
    <meta charset="UTF-8">
    <meta name="viewport" content="width=device-width, initial-scale=1.0">
    <title>Document</title>
</head>
<body>
    <custom-tag title="hello"></custom-tag><br>
    <button id="btn">속성 변경</button>
    <script>
        window.customElements.define("custom-tag", class extends HTMLElement {
                constructor() {
                    super();
                    this.observer = new MutationObserver((mutationsList) => {
                        for (const mutation of mutationsList) {
                            if (mutation.type === 'attributes') {
                                let p2 = document.createElement("p");
                                p2.textContent = `속성명 : ${mutation.attributeName}, oldValue : ${mutation.oldValue}`;
                                this.append(p2);
                            }
                        }
                    });
                }

                connectedCallback() {
                    this.putText();
                    let p = document.createElement("p");
                    p.textContent = "connectedCallback 시행됨";
                    this.append(p);

                    // 옵저버를 초기화하고, title 속성의 변화를 관찰
                    this.observer.observe(this, {
                        attributes: true,
                        attributeOldValue: true
                    });
                }

                disconnectedCallback() {
                    this.observer.disconnect();
                }

                putText() {
                    this.textContent = "반갑습니다.";
                }
            }
        );

        document.querySelector("#btn").addEventListener("click", function () {
            let customTag = document.querySelector("custom-tag");
            if (customTag) {
                customTag.setAttribute("title", "안녕하세요");
            }
        });

    </script>
</body>
</html>
'Frontend > JavaScript' 카테고리의 다른 글
| JavaScript 내장함수 : 숫자 관련 내장함수 (0) | 2024.08.04 |
|---|---|
| JavaScript 내장함수 : 인코딩 / 디코딩 함수 (0) | 2024.08.04 |
| JavaScript의 내장함수 : 타이머함수 (0) | 2024.08.04 |
| JavaScript : 예외처리에 대해서 알아보자 (0) | 2024.08.02 |
| JavaScript : 웹 컴포넌트(Web Component)란? (0) | 2024.07.31 |
| JavaScript: Date 객체에 대해서 (0) | 2024.07.31 |
| JavaScript : DOM 요소의 높이 / 너비를 알아보자(client / offset / scroll / getBoundingClientRect()) (0) | 2024.07.30 |
| JavaScript의 class를 사용해보자 (0) | 2024.07.30 |