DTO(Data Transfer Object)는 주로 데이터 전송을 목적으로 사용하는 객체이다. @Controller를 통해서 컬렉션 데이터를 반환할 때, Map의 경우에 키와 값을 직접 설정해야하며 Object 타입으로 값을 저장하게 되면 데이터 타입 체크를 하지 못하는 경우 등의 여러 문제들이 발생하는데 DTO를 통해 해결할 수 있다.
DTO 사용하기
1. DTO 클래스를 정의한다.
사용자 정보를 전달하기 위한 데이터 전송 객체인 UserDTO 클래스를 생성하여, 데이터 설정 및 getter & setter 메서드를 작성한다.
package com.example.project.dto;

// DTO 정의 : UserDTO 클래스는 사용자 정보를 전달하기 위한 데이터 전송 객체
public class UserDTO {
    // 데이터 타입과 데이터 설정
    private String name; //사용자 이름
    private Integer age; //사용자 나이
    private Boolean attendance; //사용자 참석여부

    // getter와 setter 설정
    public String getName() {
        return name;
    }

    public void setName(String name) {
        this.name = name;
    }

    public Integer getAge() {
        return age;
    }

    public void setAge(Integer age) {
        this.age = age;
    }

    public Boolean getAttendance() {
        return attendance;
    }

    public void setAttendance(Boolean attendance) {
        this.attendance = attendance;
    }
}
2. Controller 클래스를 생성하여 DTO를 활용한다.
UserController 클래스를 생성하여 UserDTO에 정의한 사용자 정보를 처리한다.
package com.example.project.controller;

import com.example.project.dto.UserDTO;
import org.springframework.http.HttpHeaders;
import org.springframework.http.HttpStatus;
import org.springframework.http.ResponseEntity;
import org.springframework.stereotype.Controller;
import org.springframework.web.bind.annotation.RequestMapping;
import org.springframework.web.bind.annotation.RequestMethod;
import org.springframework.web.bind.annotation.ResponseBody;

@Controller
public class UserController {
    // 특정URL과 HTTP메서드 요청에 대한 매핑
    @RequestMapping(value = "/dto", method = RequestMethod.GET)
    // 반환 값이 HTTP응답 본문에 포함
    @ResponseBody
    // UserDTO 클래스 활용
    public ResponseEntity<UserDTO> dtoEx(){
        UserDTO user = new UserDTO();
        // 이름 설정
        user.setName("코딩쥐");
        // 나이 설정
        user.setAge(10);
        // 참석 여부 설정
        user.setAttendance(true);

        //헤더 설정
        HttpHeaders headers = new HttpHeaders();
        headers.add("Content-type", "application/json");
        headers.add("Accept-Charset", "UTF8");

        // ResponseEntity 객체로 리턴
        return new ResponseEntity<>(user, HttpStatus.OK);
    }
}
DTO를 사용하면 Map 처럼 키 값을 일일이 넣지 않아도 되며, 각 필드에 대한 데이터 타입이 명확하게 정의되어 코드의 안정성을 높일 수 있다. 또한 DTO 클래스 내부에 데이터 검증 로직을 추가할 수 있어 유효성 검사를 쉽게 할 수 있다.
중첩 DTO 사용하기
아래 예제는 ContactDTO 클래스를 생성하여 UserDTO와 중첩하여 사용하는 예시이다.
1. 사용 할 DTO 클래스를 정의한다.
사용자의 연락처 정보를 전달하기 위한 데이터 전송 객체인 ContactDTO 클래스를 생성한다.
// ContactDTO.java
package com.example.project.dto;

public class ContactDTO {
    private String email; //사용자 이메일
    private String phone; //사용자 번호

    //생성자 생성
    public ContactDTO(String email, String phone) {
        this.email = email;
        this.phone = phone;
    }

    //getter 메서드 생성
    public String getEmail() {
        return email;
    }

    public String getPhone() {
        return phone;
    }
}
2. DTO 안에 다른 DTO 타입의 객체를 중첩시킨다.
사용자 정보를 전달하기 위한 데이터 전송 객체인 UserDTO 클래스를 생성한다. ContactUTO를 UserDTO에 중첩시킨다.
// UserDTO.java
package com.example.project.dto;

public class UserDTO {
    private String name; //사용자 이름
    private Integer age; //사용자 나이
    private Boolean attendance; //사용자 참석여부
    private ContactDTO contact; // 사용자 연락정보

    // 생성자를 생성
    public UserDTO(String name, Integer age, Boolean attendance, ContactDTO contact) {
        this.name = name;
        this.age = age;
        this.attendance = attendance;
        this.contact = contact;
    }

    // getter메서드 생성
    public String getName() {
        return name;
    }

    public Integer getAge() {
        return age;
    }

    public Boolean getAttendance() {
        return attendance;
    }

    public ContactDTO getContact() {
        return contact;
    }
}
3. Controller 클래스를 생성하여 DTO를 활용한다.
package com.example.project.controller;

import com.example.project.dto.ContactDTO;
import com.example.project.dto.UserDTO;
import org.springframework.http.HttpHeaders;
import org.springframework.http.HttpStatus;
import org.springframework.http.ResponseEntity;
import org.springframework.stereotype.Controller;
import org.springframework.web.bind.annotation.RequestMapping;
import org.springframework.web.bind.annotation.RequestMethod;
import org.springframework.web.bind.annotation.ResponseBody;

import java.util.ArrayList;
import java.util.List;

@Controller
public class UserController {
    // 특정URL과 HTTP메서드 요청에 대한 매핑
    @RequestMapping(value = "/dto", method = RequestMethod.GET)
    // 반환 값이 HTTP응답 본문에 포함
    @ResponseBody
    // UserDTO 클래스 활용
    public ResponseEntity<List<UserDTO>> dtoEx(){
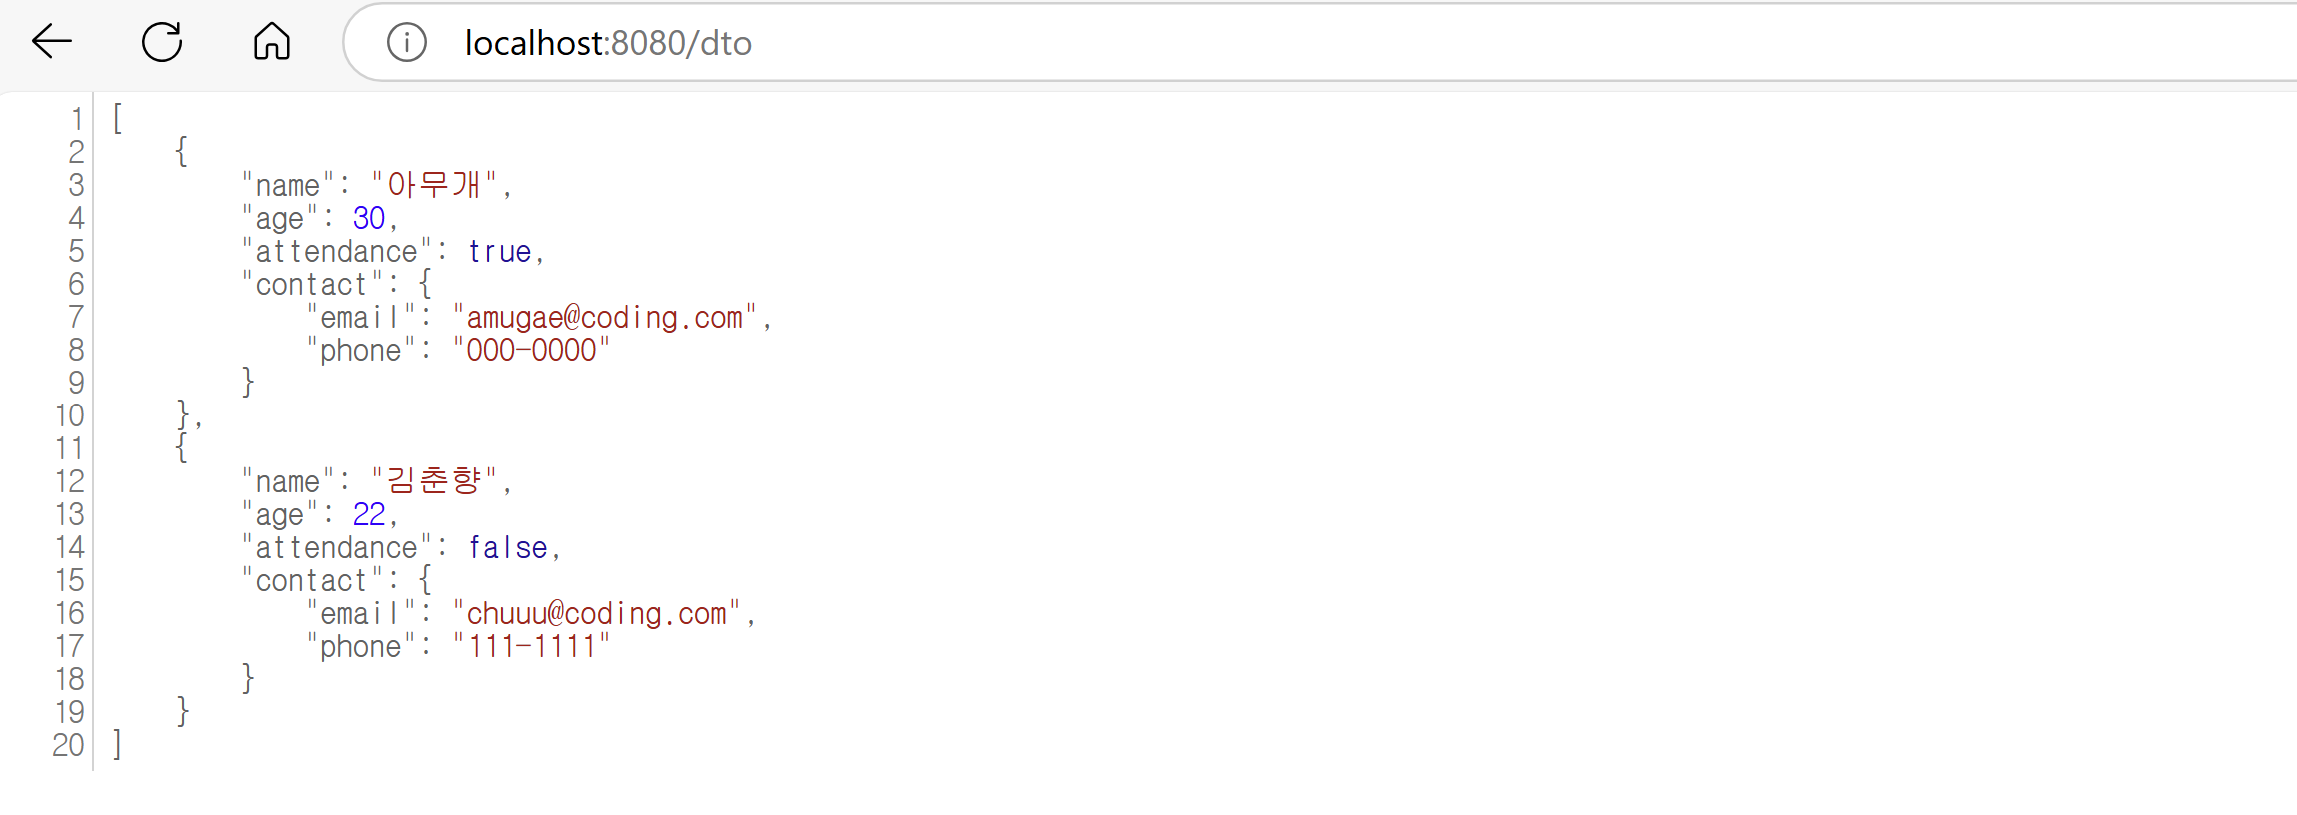
        UserDTO user1 = new UserDTO("아무개", 30, true, new ContactDTO("amugae@coding.com", "000-0000"));
        UserDTO user2 = new UserDTO("김춘향", 22, false, new ContactDTO("chuuu@coding.com", "111-1111"));

        // user들을 담는 배열 생성
        List<UserDTO> userlist = new ArrayList<>();
        userlist.add(user1);
        userlist.add(user2);

        //헤더 설정
        HttpHeaders headers = new HttpHeaders();
        headers.add("Content-type", "application/json");
        headers.add("Accept-Charset", "UTF8");

        // ResponseEntity는 UserDTO를 포함한 리스트를 반환하며, 클라이언트에는 JSON 배열 형태로 전달한다.
        return new ResponseEntity<List<UserDTO>>(userlist, HttpStatus.OK);
    }
}
'Backend > Spring' 카테고리의 다른 글
| Spring : @GetMapping에 대해서 (0) | 2024.11.03 |
|---|---|
| Spring : 파라미터를 처리하는 방법 ( @PathVariable, @RequestParam, @RequestMapping ) (0) | 2024.10.27 |
| Spring : Record 클래스 사용하기 (0) | 2024.10.27 |
| Spring : Lombok(롬복)에 대해 알아보자 (0) | 2024.10.27 |
| Spring : @Controller 활용하여 다양한 컬렉션 데이터 반환하기 (0) | 2024.10.26 |
| Spring : @Controller와 @RestController 어노테이션에 대해서 (1) | 2024.10.26 |
| Spring : @Autowired 어노테이션에 대해서 (0) | 2024.10.26 |
| Spring : @Component 어노테이션에 대해서 (0) | 2024.10.24 |