HTTP 요청의 Body에 포함된 데이터를 처리할 때는 POST, PUT, PATCH, DELETE 메서드를 사용한다. 해당 메서드를 통해서 클라이언트가 서버에 데이터를 전송하고, 서버는 이 데이터를 바탕으로 로직을 수행한다.
JSON 데이터 처리하기
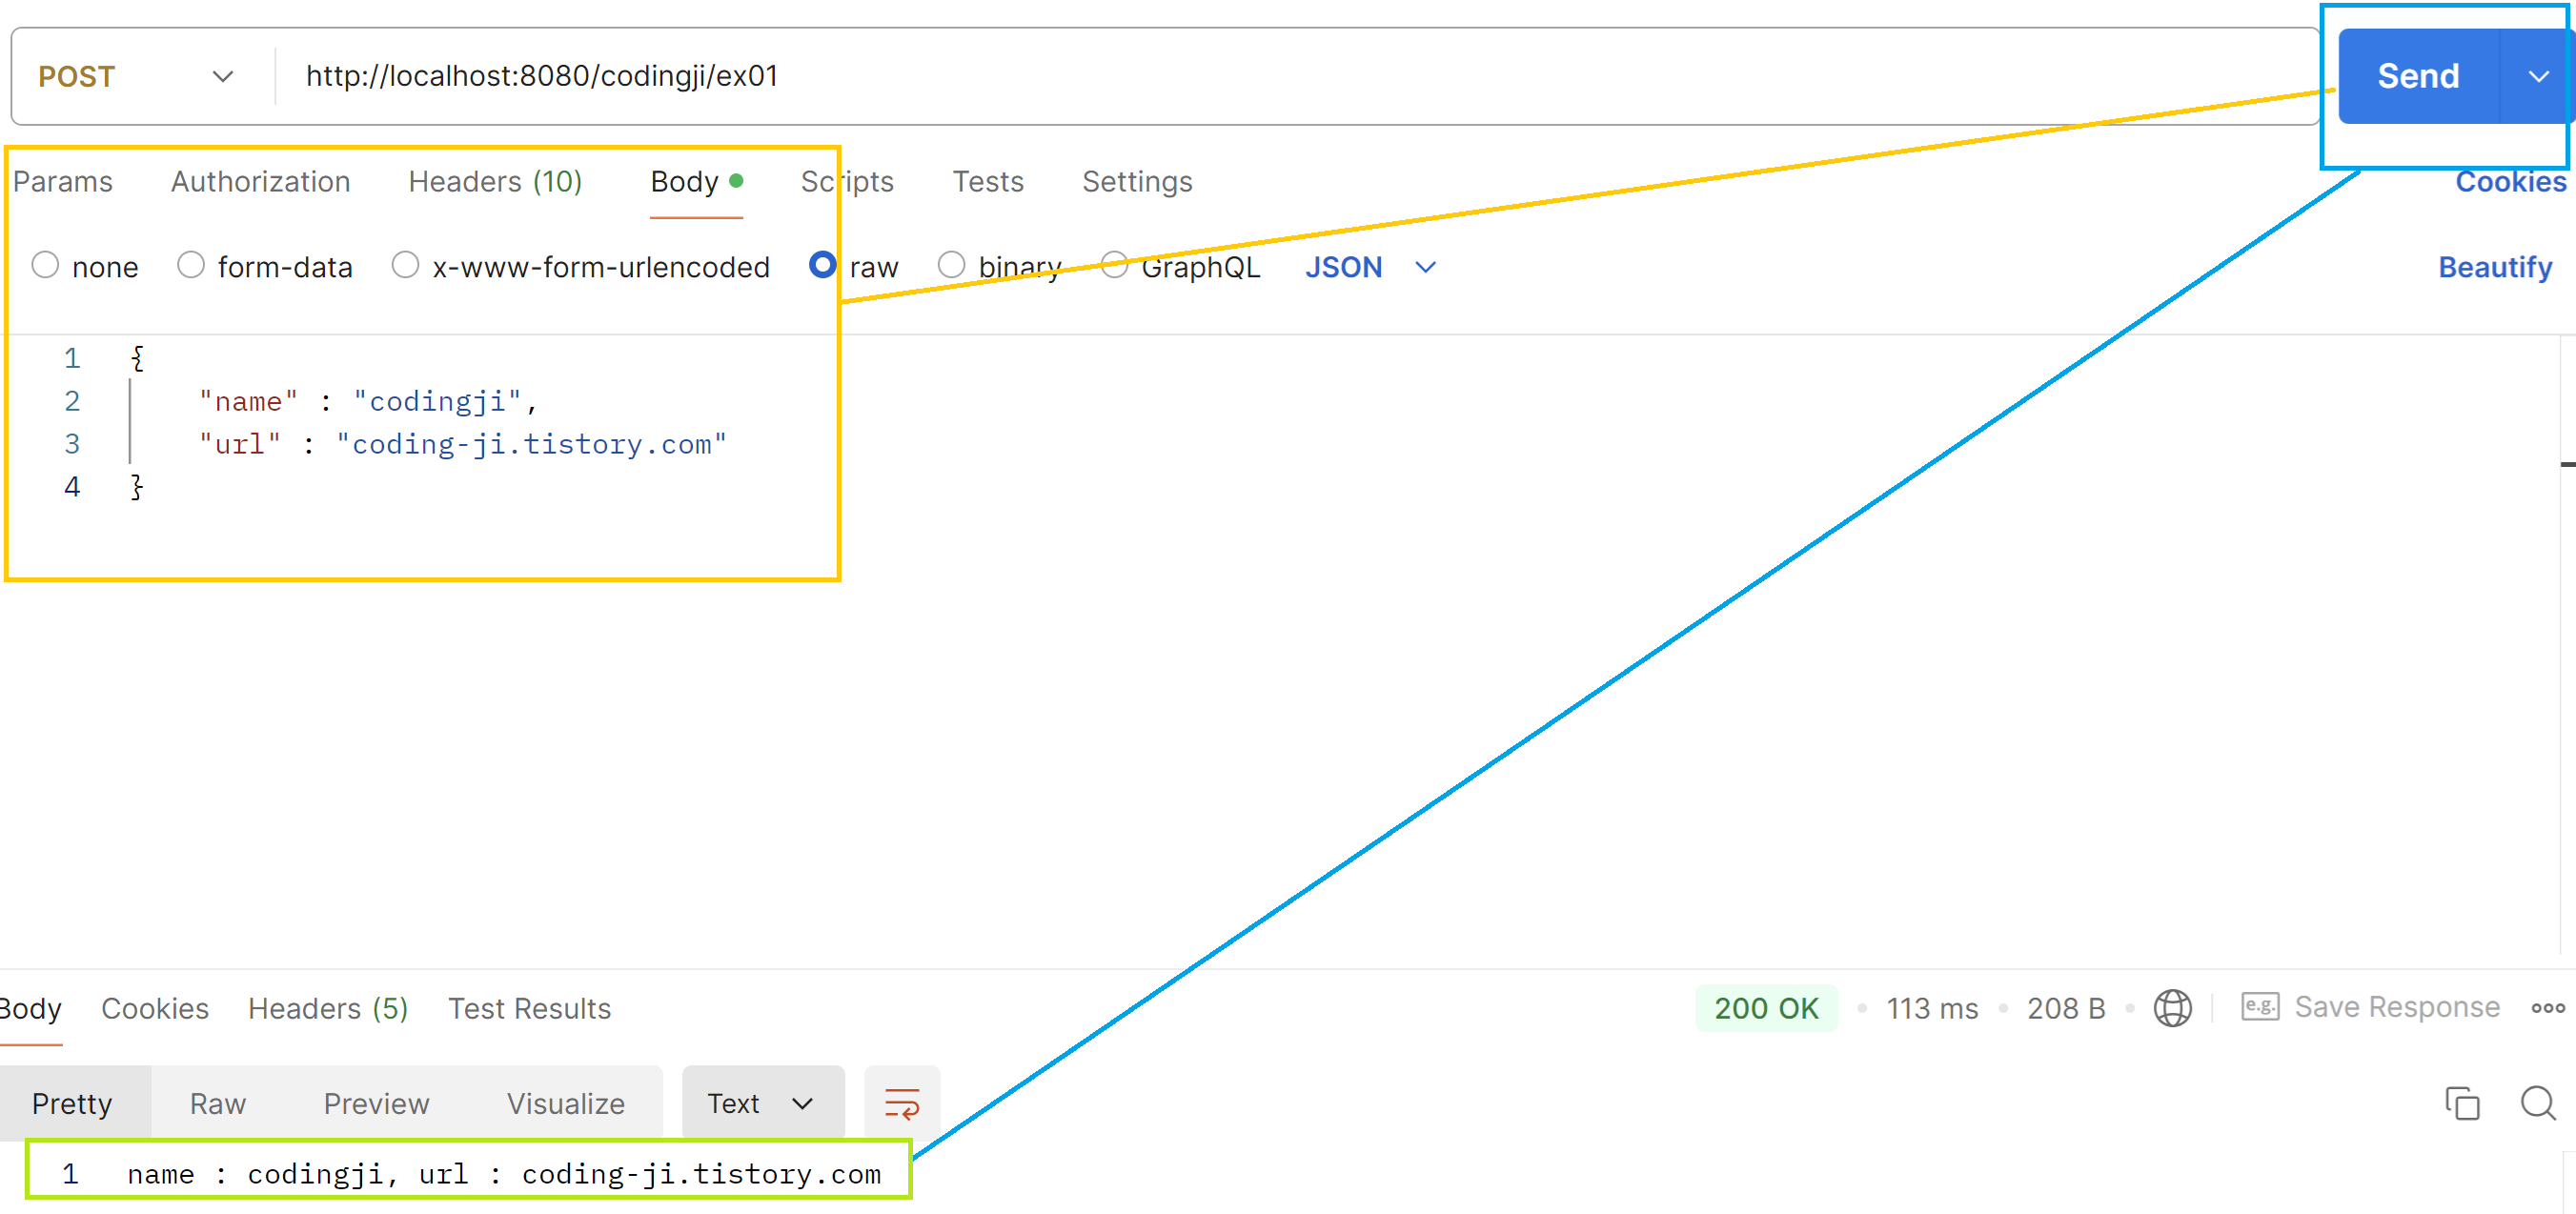
HTTP 요청의 Body에서 데이터를 가져오기 위해서는 @RequestBody 어노테이션이 필요하다. 아래 예제는 "name : codingji"와 "url : coding-ji.tistory.com"이라는 JSON 형식의 데이터를 POST 요청으로 받아 처리하는 로직이다. 아래 예제를 보여주기 위해서 포스트맨을 사용했다.
package com.example.project1.controller;

import org.springframework.http.HttpStatus;
import org.springframework.http.ResponseEntity;
import org.springframework.web.bind.annotation.PostMapping;
import org.springframework.web.bind.annotation.RequestBody;
import org.springframework.web.bind.annotation.RequestMapping;
import org.springframework.web.bind.annotation.RestController;

import java.util.Map;

@RestController
@RequestMapping("/codingji")
public class ExampleController {
    // POST 요청을 처리하는 메서드
    @PostMapping("/ex01")
    // JSON 형태의 데이터이기 때문에 Map을 통해 데이터를 받아옴
    public ResponseEntity<String> ex01(@RequestBody Map<String, String> data) {
        // JSON 데이터에서 "name"과 "url" 값을 추출
        String name = data.get("name");
        String url = data.get("url");

        // 추출한 데이터를 포함한 응답 메시지 반환
        return new ResponseEntity<>("name: " + name + ", url: " + url, HttpStatus.OK);
    }
}
Body에 해당하는 데이터를 작성한 후, http://localhost:8080/codingji/ex01으로 POST 요청을 보내면 Spring에서 처리한 데이터가 전송되는 모습을 확인할 수 있다.
DTO 사용해서 JSON 데이터 처리하기
1. DTO(Data Transfer Object)를 생성한다.
UserDTO 사용자 정보를 전달하기 위한 DTO를 레코드 타입으로 생성한다.
package com.example.project1.dto;

// DTO 정의 : UserDTO 클래스는 사용자 정보를 전달하기 위한 데이터 전송 객체
public record UserDTO(
        String name,
        Integer age,
        Boolean attendance){}
2. Controller에서 JSON 데이터를 처리할 로직을 생성한다.
package com.example.project1.controller;
import com.example.project1.dto.UserDTO;
import org.springframework.http.HttpStatus;
import org.springframework.http.ResponseEntity;
import org.springframework.web.bind.annotation.PostMapping;
import org.springframework.web.bind.annotation.RequestBody;
import org.springframework.web.bind.annotation.RequestMapping;
import org.springframework.web.bind.annotation.RestController;
@RestController
@RequestMapping("/codingji")
public class ExampleController {
@PostMapping("/user")
// UserDTO를 사용해서 name, age, attendance를 가져온다.
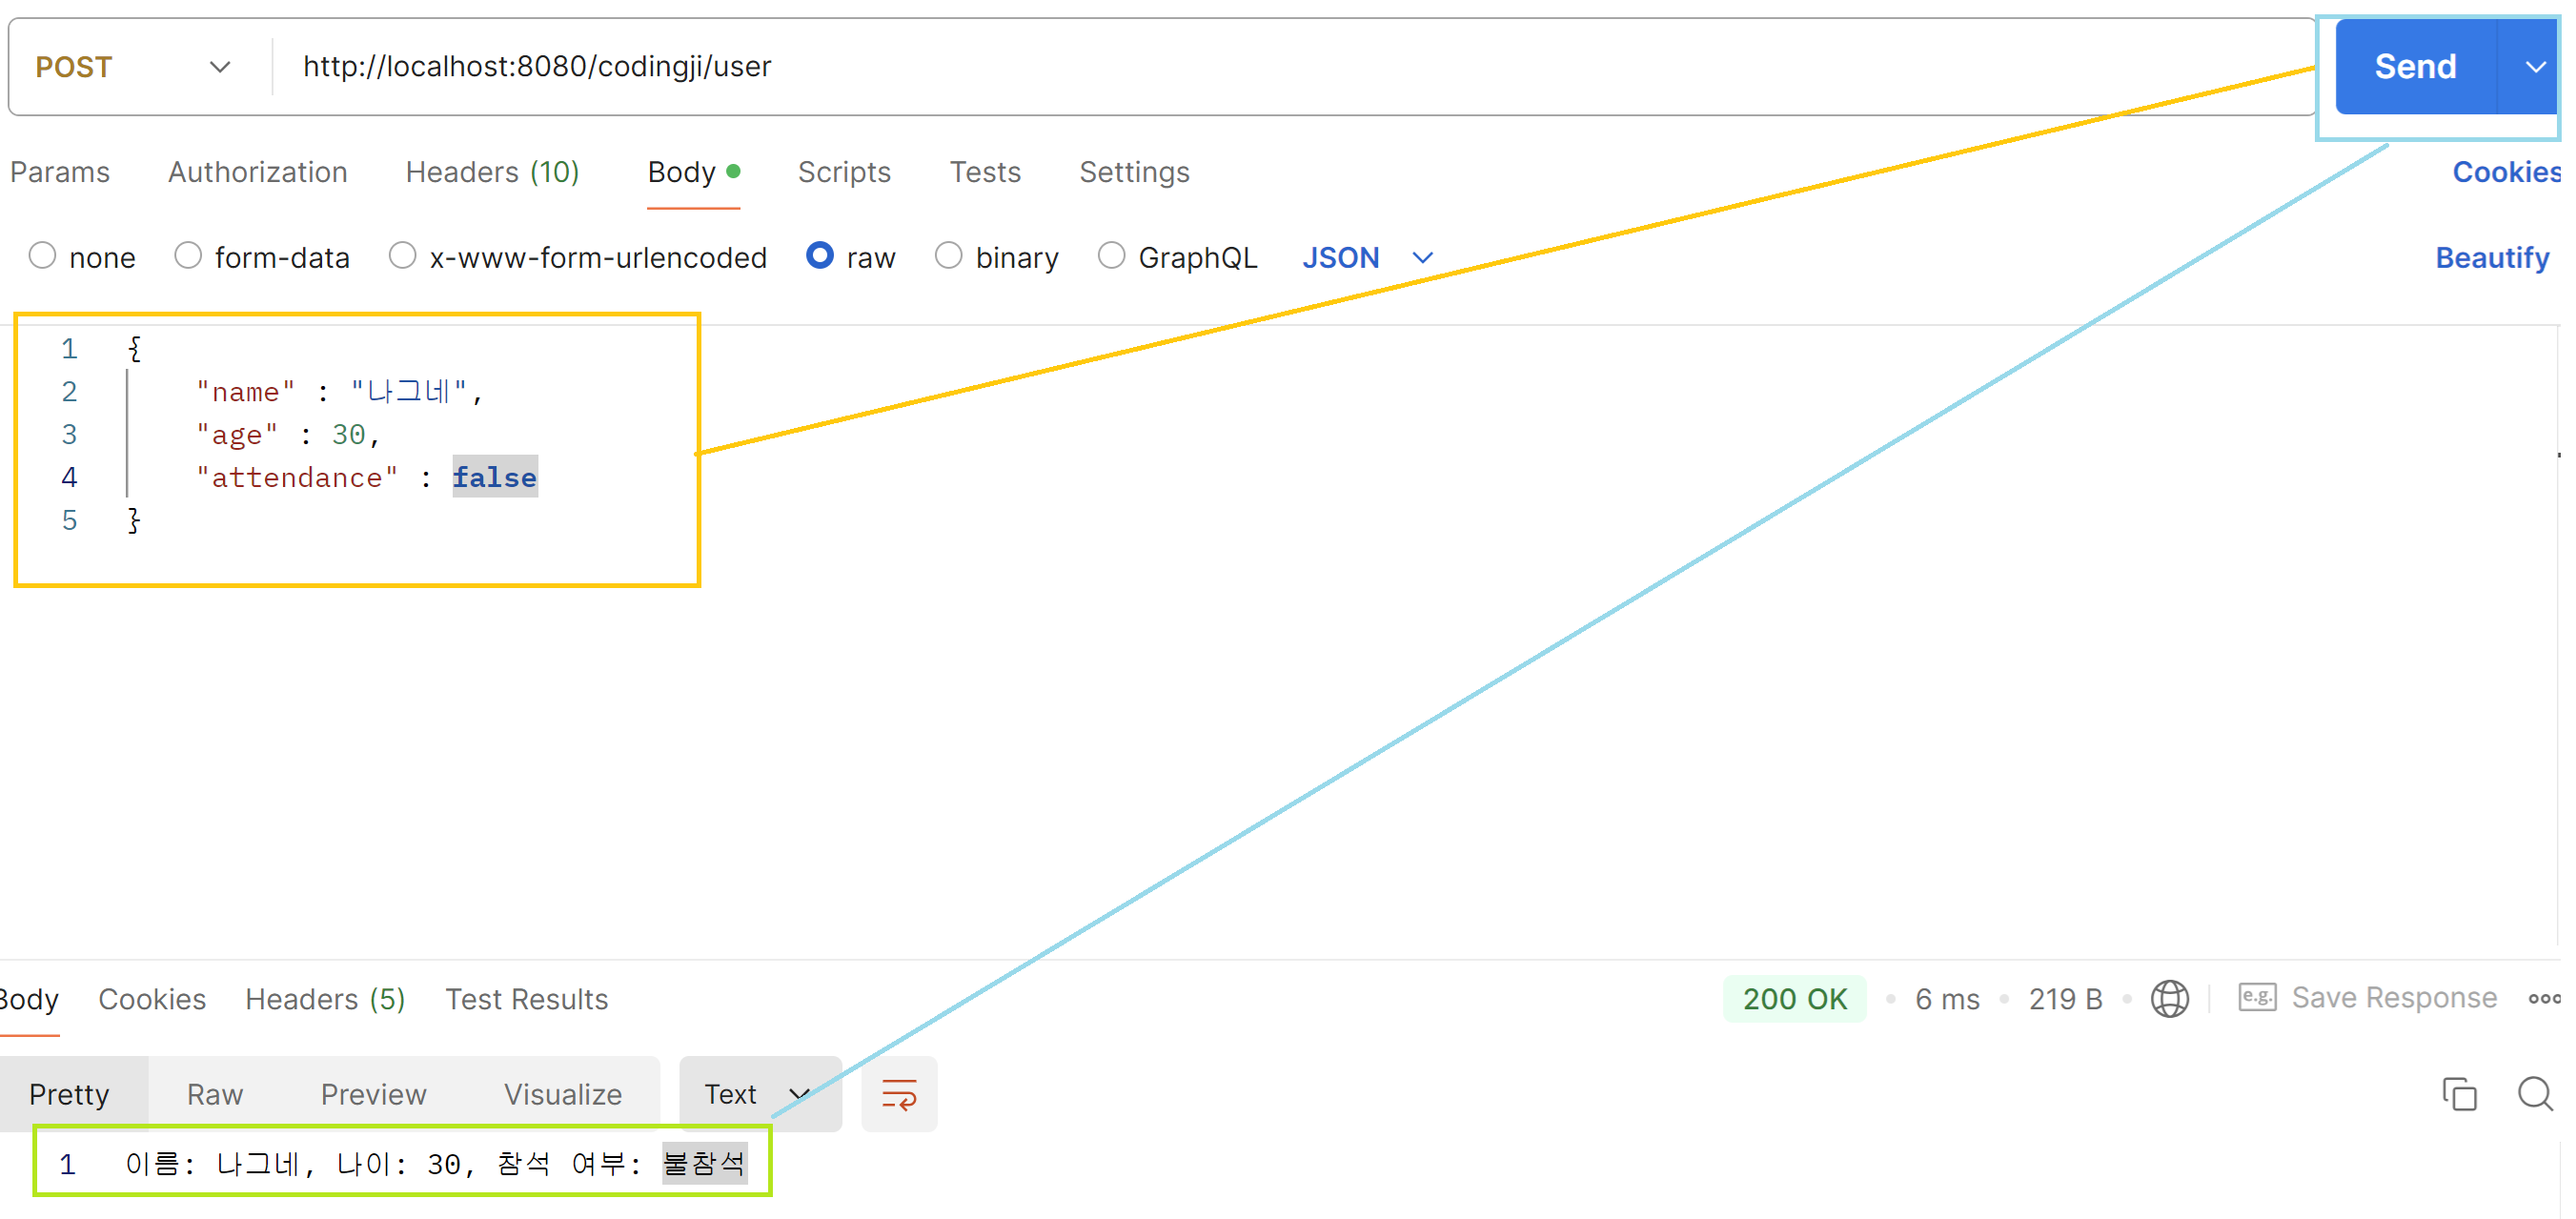
public ResponseEntity<String> user(@RequestBody UserDTO data){
// 지시자를 통해서 데이터 처리
String responseMessage = String.format("이름: %s, 나이: %d, 참석 여부: %s",
data.name(), data.age(), data.attendance() ? "참석" : "불참석");
return new ResponseEntity<>(responseMessage, HttpStatus.OK);
}
}
List 사용하여 JSON 데이터 처리하기
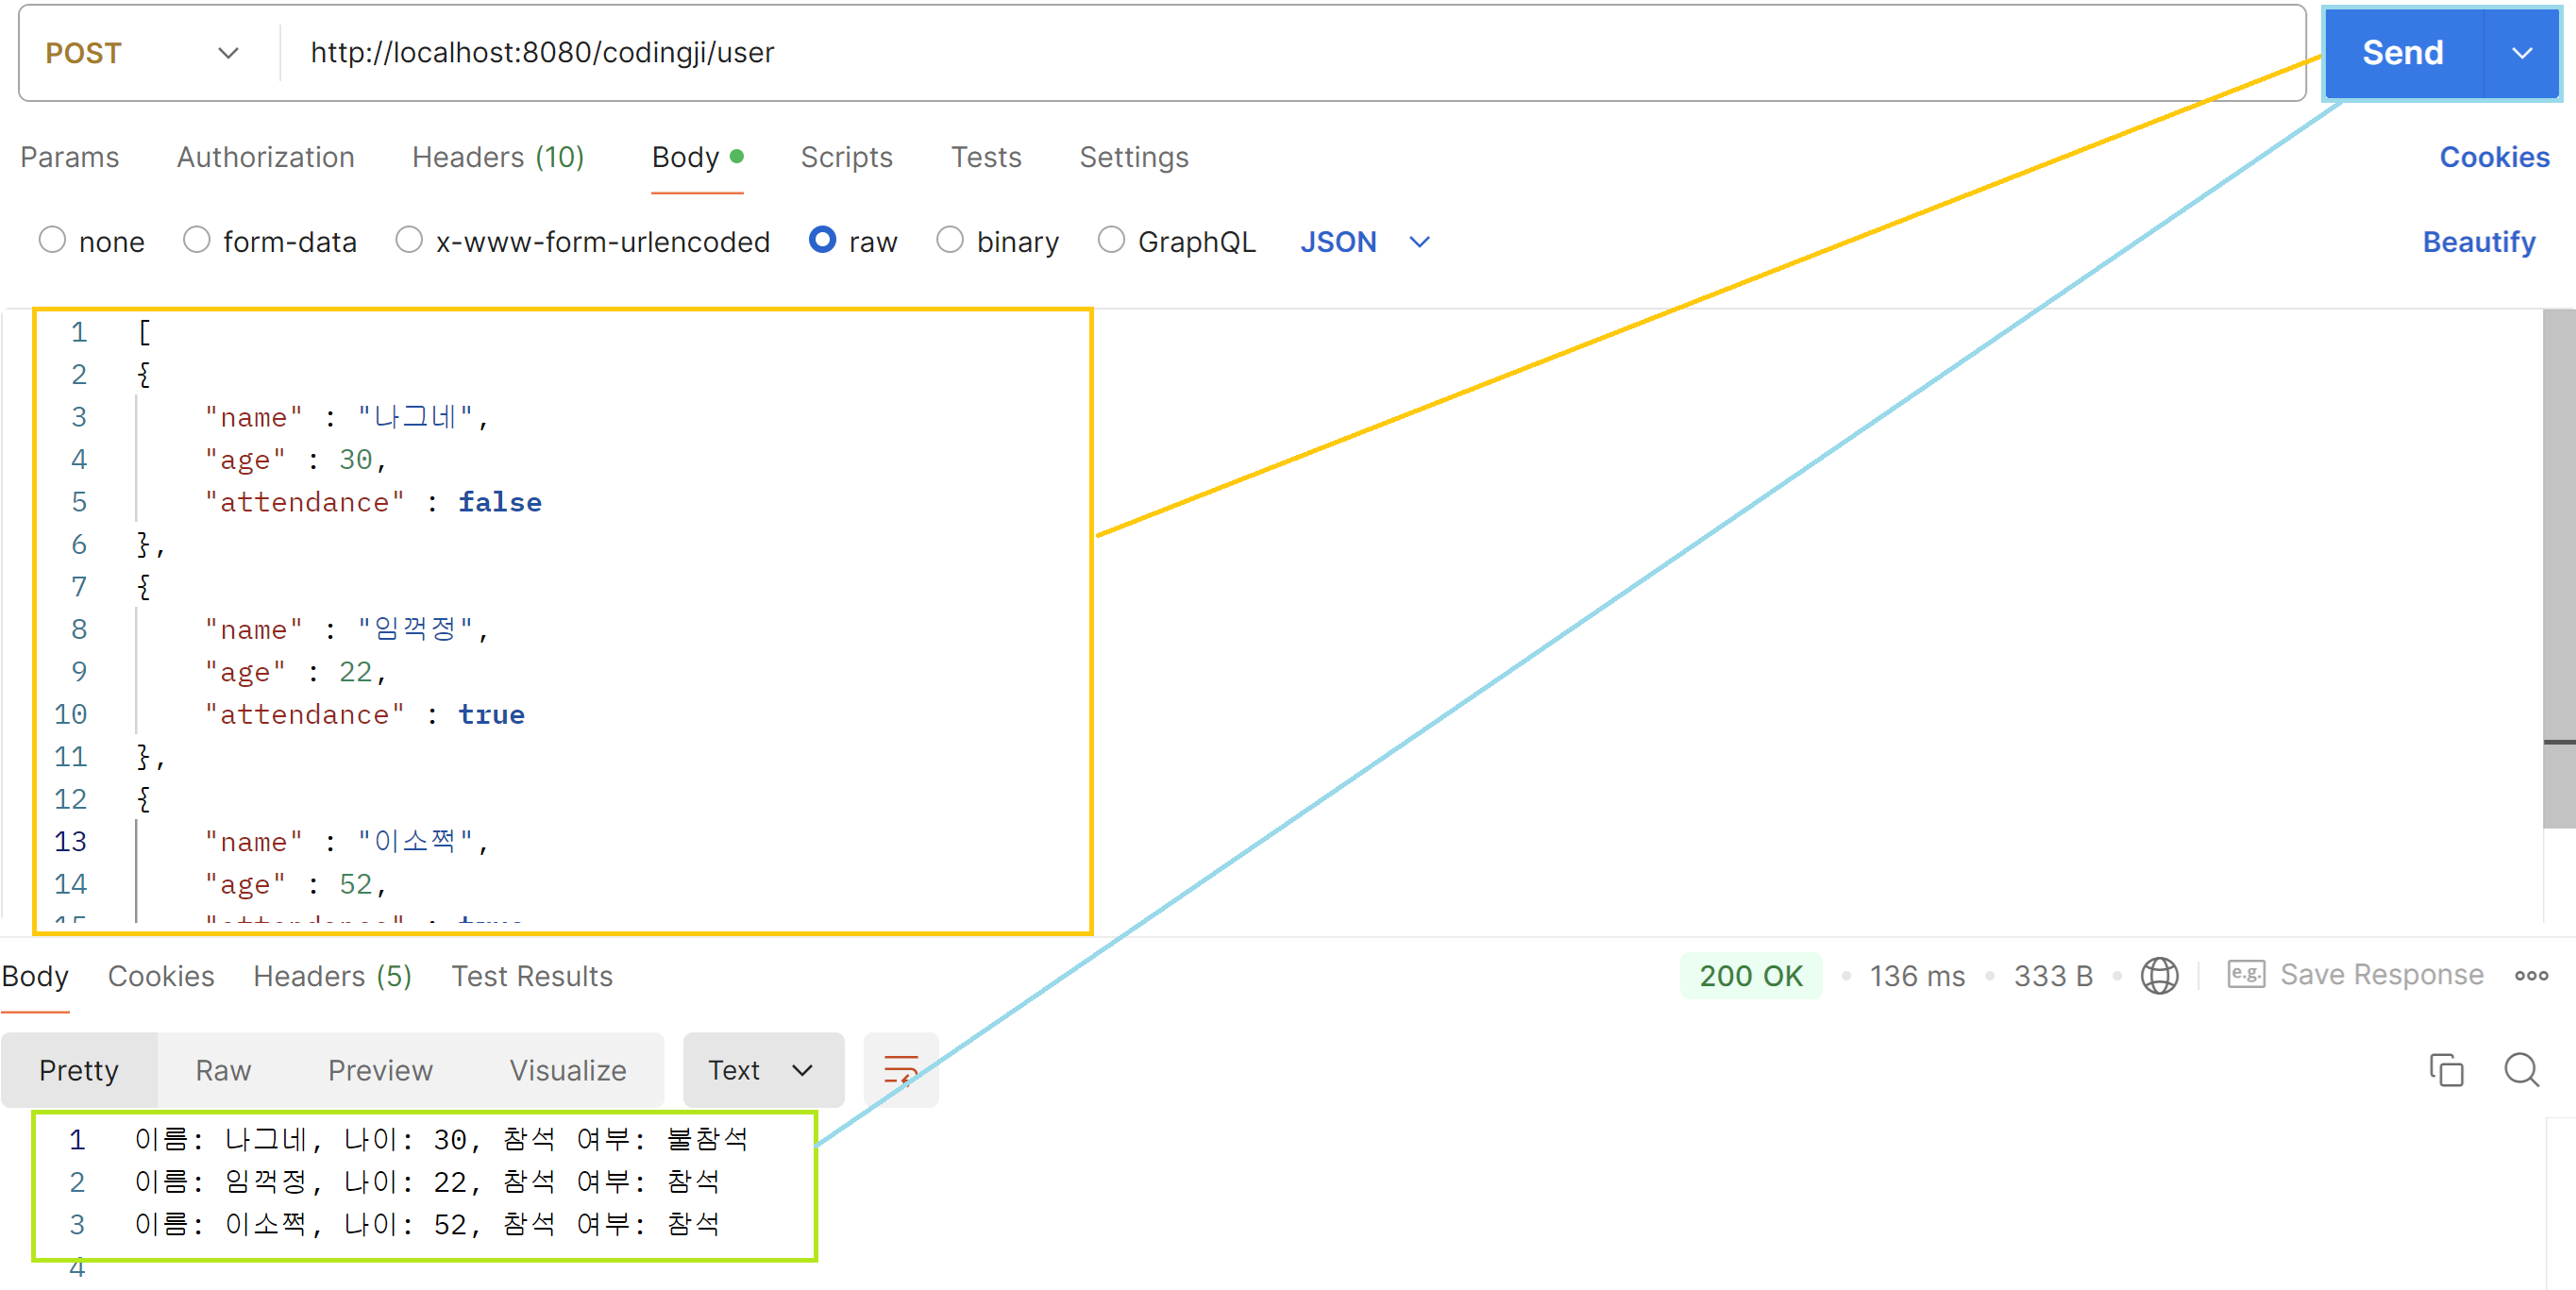
위의 예제는 JSON 데이터가 한 개만 있을 때의 처리 방법을 보여준다. JSON 데이터가 여러 개일 경우 List를 사용하여 처리할 수 있다.
package com.example.project1.controller;

import com.example.project1.dto.UserDTO;
import org.springframework.http.HttpStatus;
import org.springframework.http.ResponseEntity;
import org.springframework.web.bind.annotation.PostMapping;
import org.springframework.web.bind.annotation.RequestBody;
import org.springframework.web.bind.annotation.RequestMapping;
import org.springframework.web.bind.annotation.RestController;

import java.util.List;

@RestController
@RequestMapping("/codingji")
public class ExampleController {
    @PostMapping("/user")
    // UserDTO를 사용해서 name, age, attendance를 가져온다.
    public ResponseEntity<String> user(@RequestBody List<UserDTO> datas){
        // StringBuilder를 통해 같은 메모리 공간을 사용하여 문자열을 수정할 수 있다.
        StringBuilder responseMessages = new StringBuilder();

        // for를 사용해서 해당하는 데이터들을 처리한 후에 responseMessage에 문자열을 더한다.
        for(UserDTO data : datas){
            String responseMessage = String.format("이름: %s, 나이: %d, 참석 여부: %s %n",
                    data.name(), data.age(), data.attendance() ? "참석" : "불참석");
            responseMessages.append(responseMessage);
        }
        return new ResponseEntity<>(responseMessages.toString(), HttpStatus.OK);
    }
}
중첩 구조의 JSON 데이터 처리
(1) 객체 안에 객체
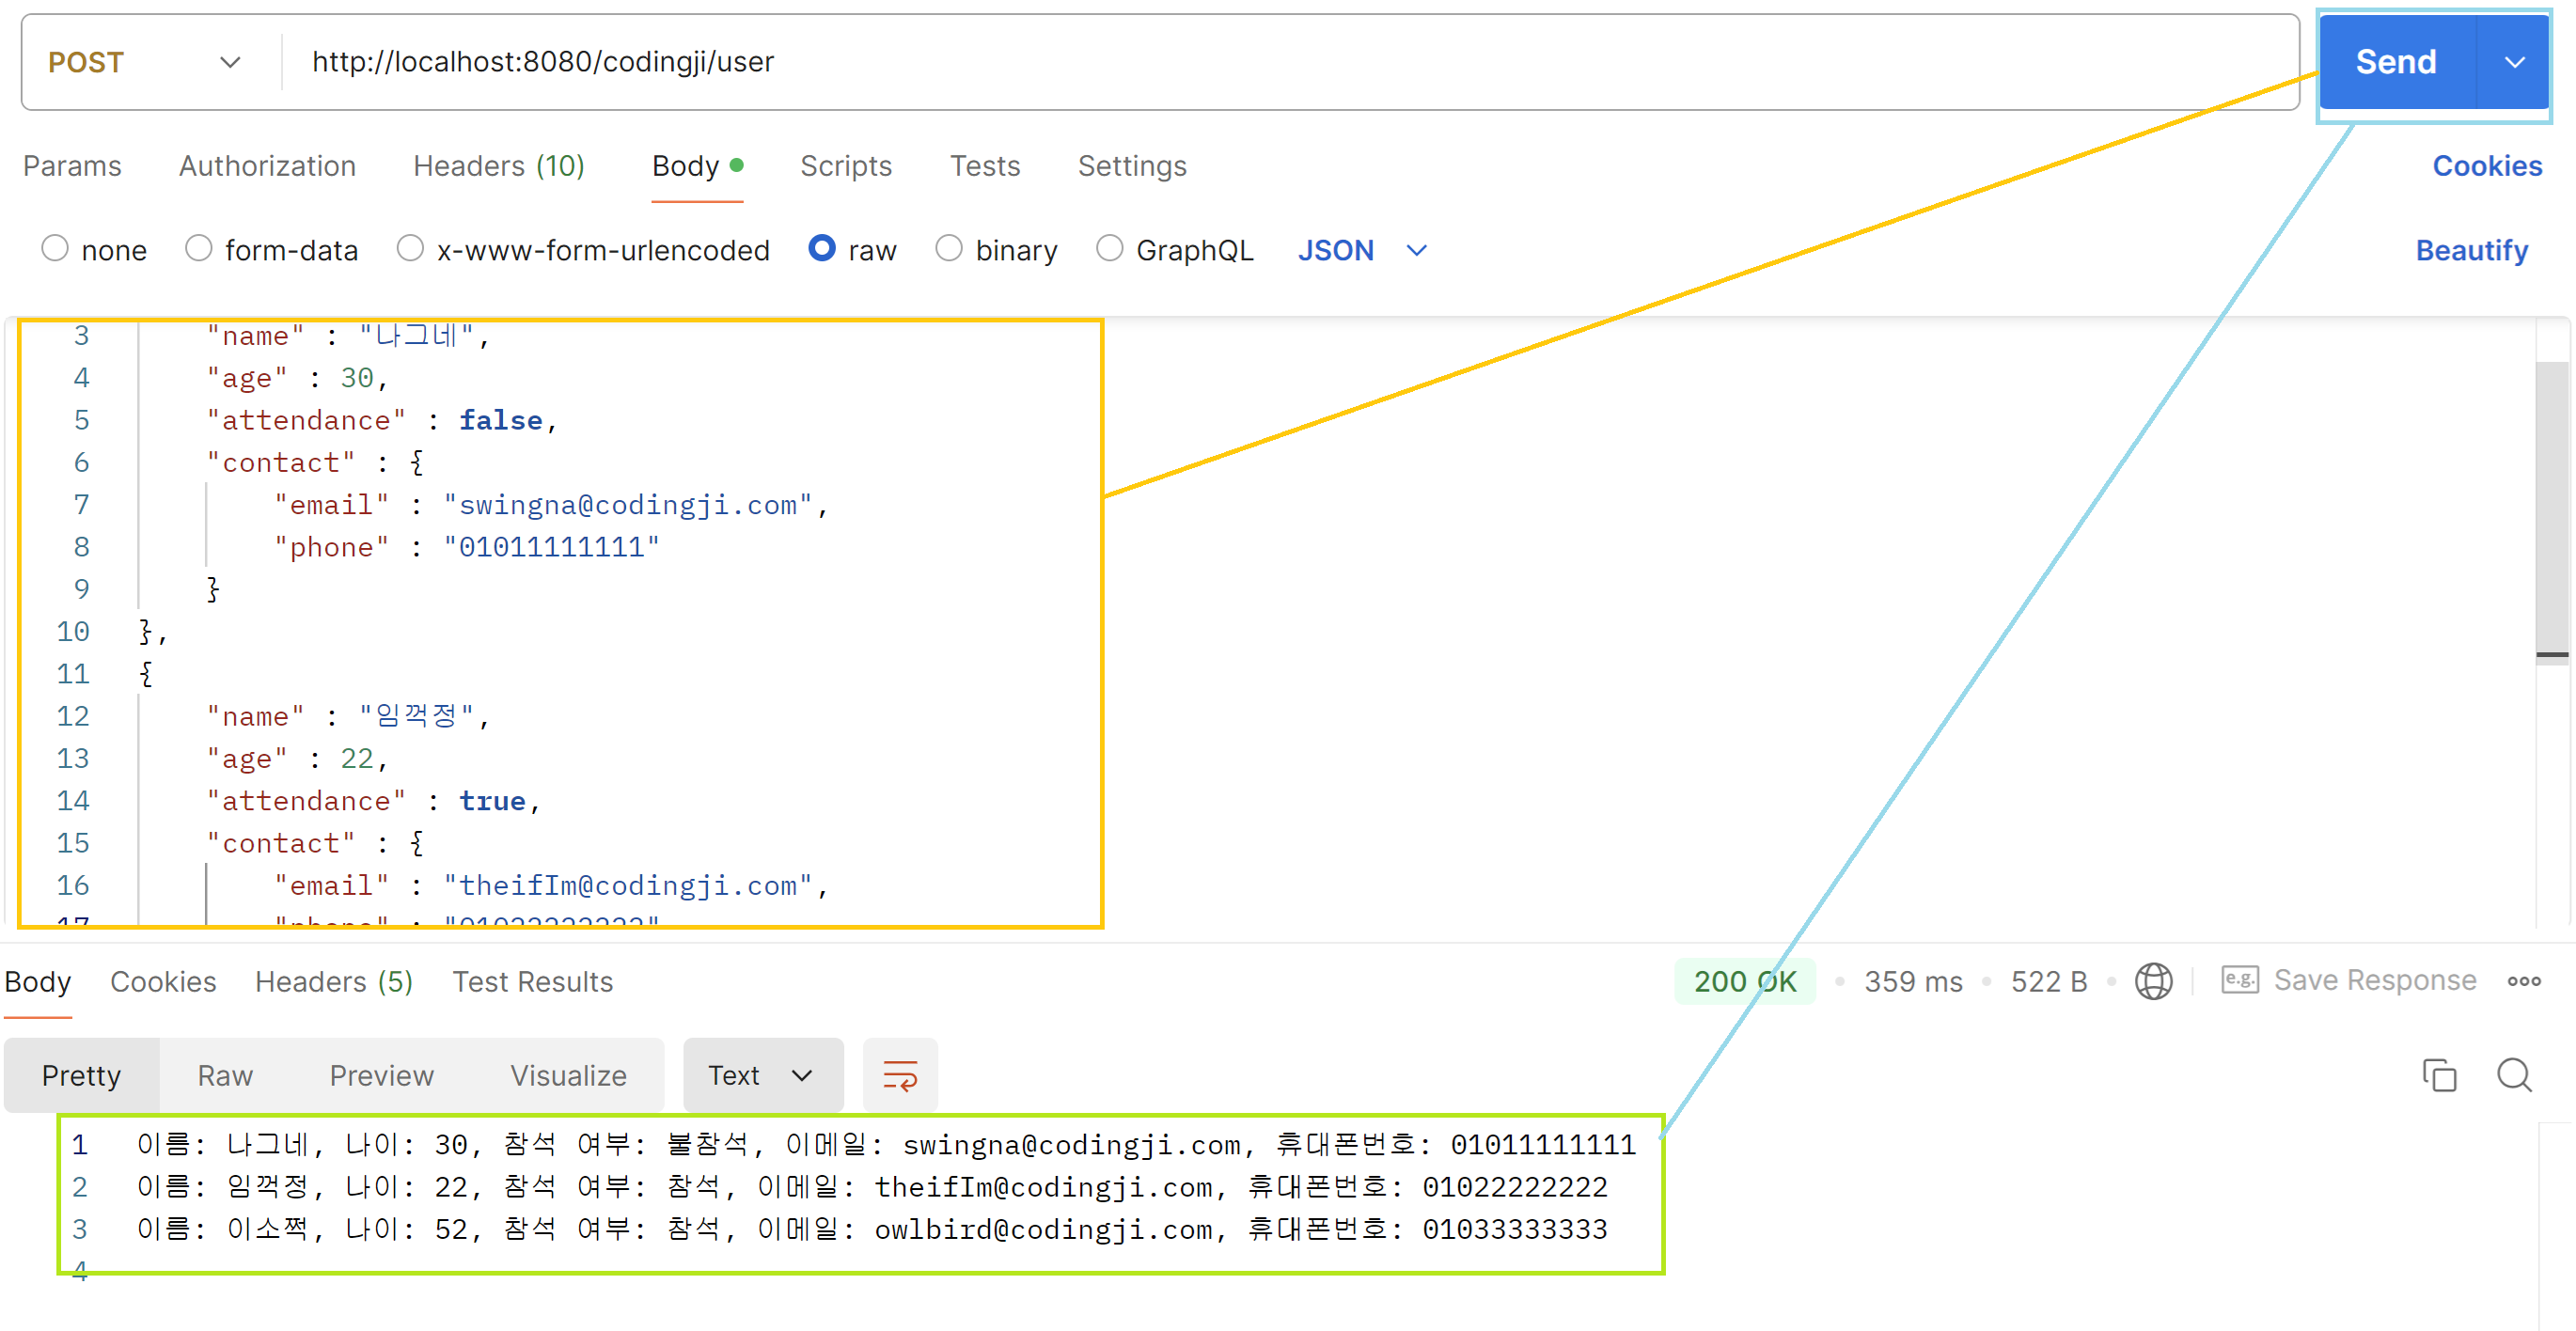
만약 객체 안에 다른 객체가 포함되는 경우, 즉 DTO가 중첩되었을 때 처리해야할 때에는 getter메서드를 통해서 가져올 수 있다.
<<JSON 데이터 예제>>
// JSON 데이터
[
{
    "name" : "나그네",
    "age" : 30,
    "attendance" : false,
    "contact" : {
        "email" : "swingna@codingji.com",
        "phone" : "01011111111"
    }
},
{
    "name" : "임꺽정",
    "age" : 22,
    "attendance" : true,
    "contact" : {
        "email" : "theifIm@codingji.com",
        "phone" : "01022222222"
    }
},
{
    "name" : "이소쩍",
    "age" : 52,
    "attendance" : true,
    "contact" : {
        "email" : "owlbird@codingji.com",
        "phone" : "01033333333"
    }
}
]
1. DTO를 생성한다.
UserDTO에 ContactDTO가 중첩되어 있다.
// ContactDTO.java
package com.example.project1.dto;

public record ContactDTO(
        String email,
        String phone) {}
//UserDTO
package com.example.project1.dto;
public record UserDTO(
String name,
Integer age,
Boolean attendance,
ContactDTO contact){}
2. Controller에서 JSON 데이터를 처리할 로직을 생성한다.
package com.example.project1.controller;

import com.example.project1.dto.UserDTO;
import org.springframework.http.HttpStatus;
import org.springframework.http.ResponseEntity;
import org.springframework.web.bind.annotation.PostMapping;
import org.springframework.web.bind.annotation.RequestBody;
import org.springframework.web.bind.annotation.RequestMapping;
import org.springframework.web.bind.annotation.RestController;

import java.util.List;

@RestController
@RequestMapping("/codingji")
public class ExampleController {
    @PostMapping("/user")
    public ResponseEntity<String> user(@RequestBody List<UserDTO> datas){
        // StringBuilder를 통해 같은 메모리 공간을 사용하여 문자열을 수정할 수 있다.
        StringBuilder responseMessages = new StringBuilder();

        for(UserDTO data : datas){
            String responseMessage =
                    String.format("이름: %s, 나이: %d, 참석 여부: %s, 이메일: %s, 휴대폰번호: %s %n",
                            data.name(),
                            data.age(),
                            data.attendance() ? "참석" : "불참석",
                            data.contact().email(), // UserDTO의 contact 객체에서 이메일 가져오기
                            data.contact().phone()); // UserDTO의 contact 객체에서 휴대폰번호 가져오기
            responseMessages.append(responseMessage);
        }
        return new ResponseEntity<>(responseMessages.toString(), HttpStatus.OK);
    }
}
(2) 배열 안 객체 안 배열 안 객체
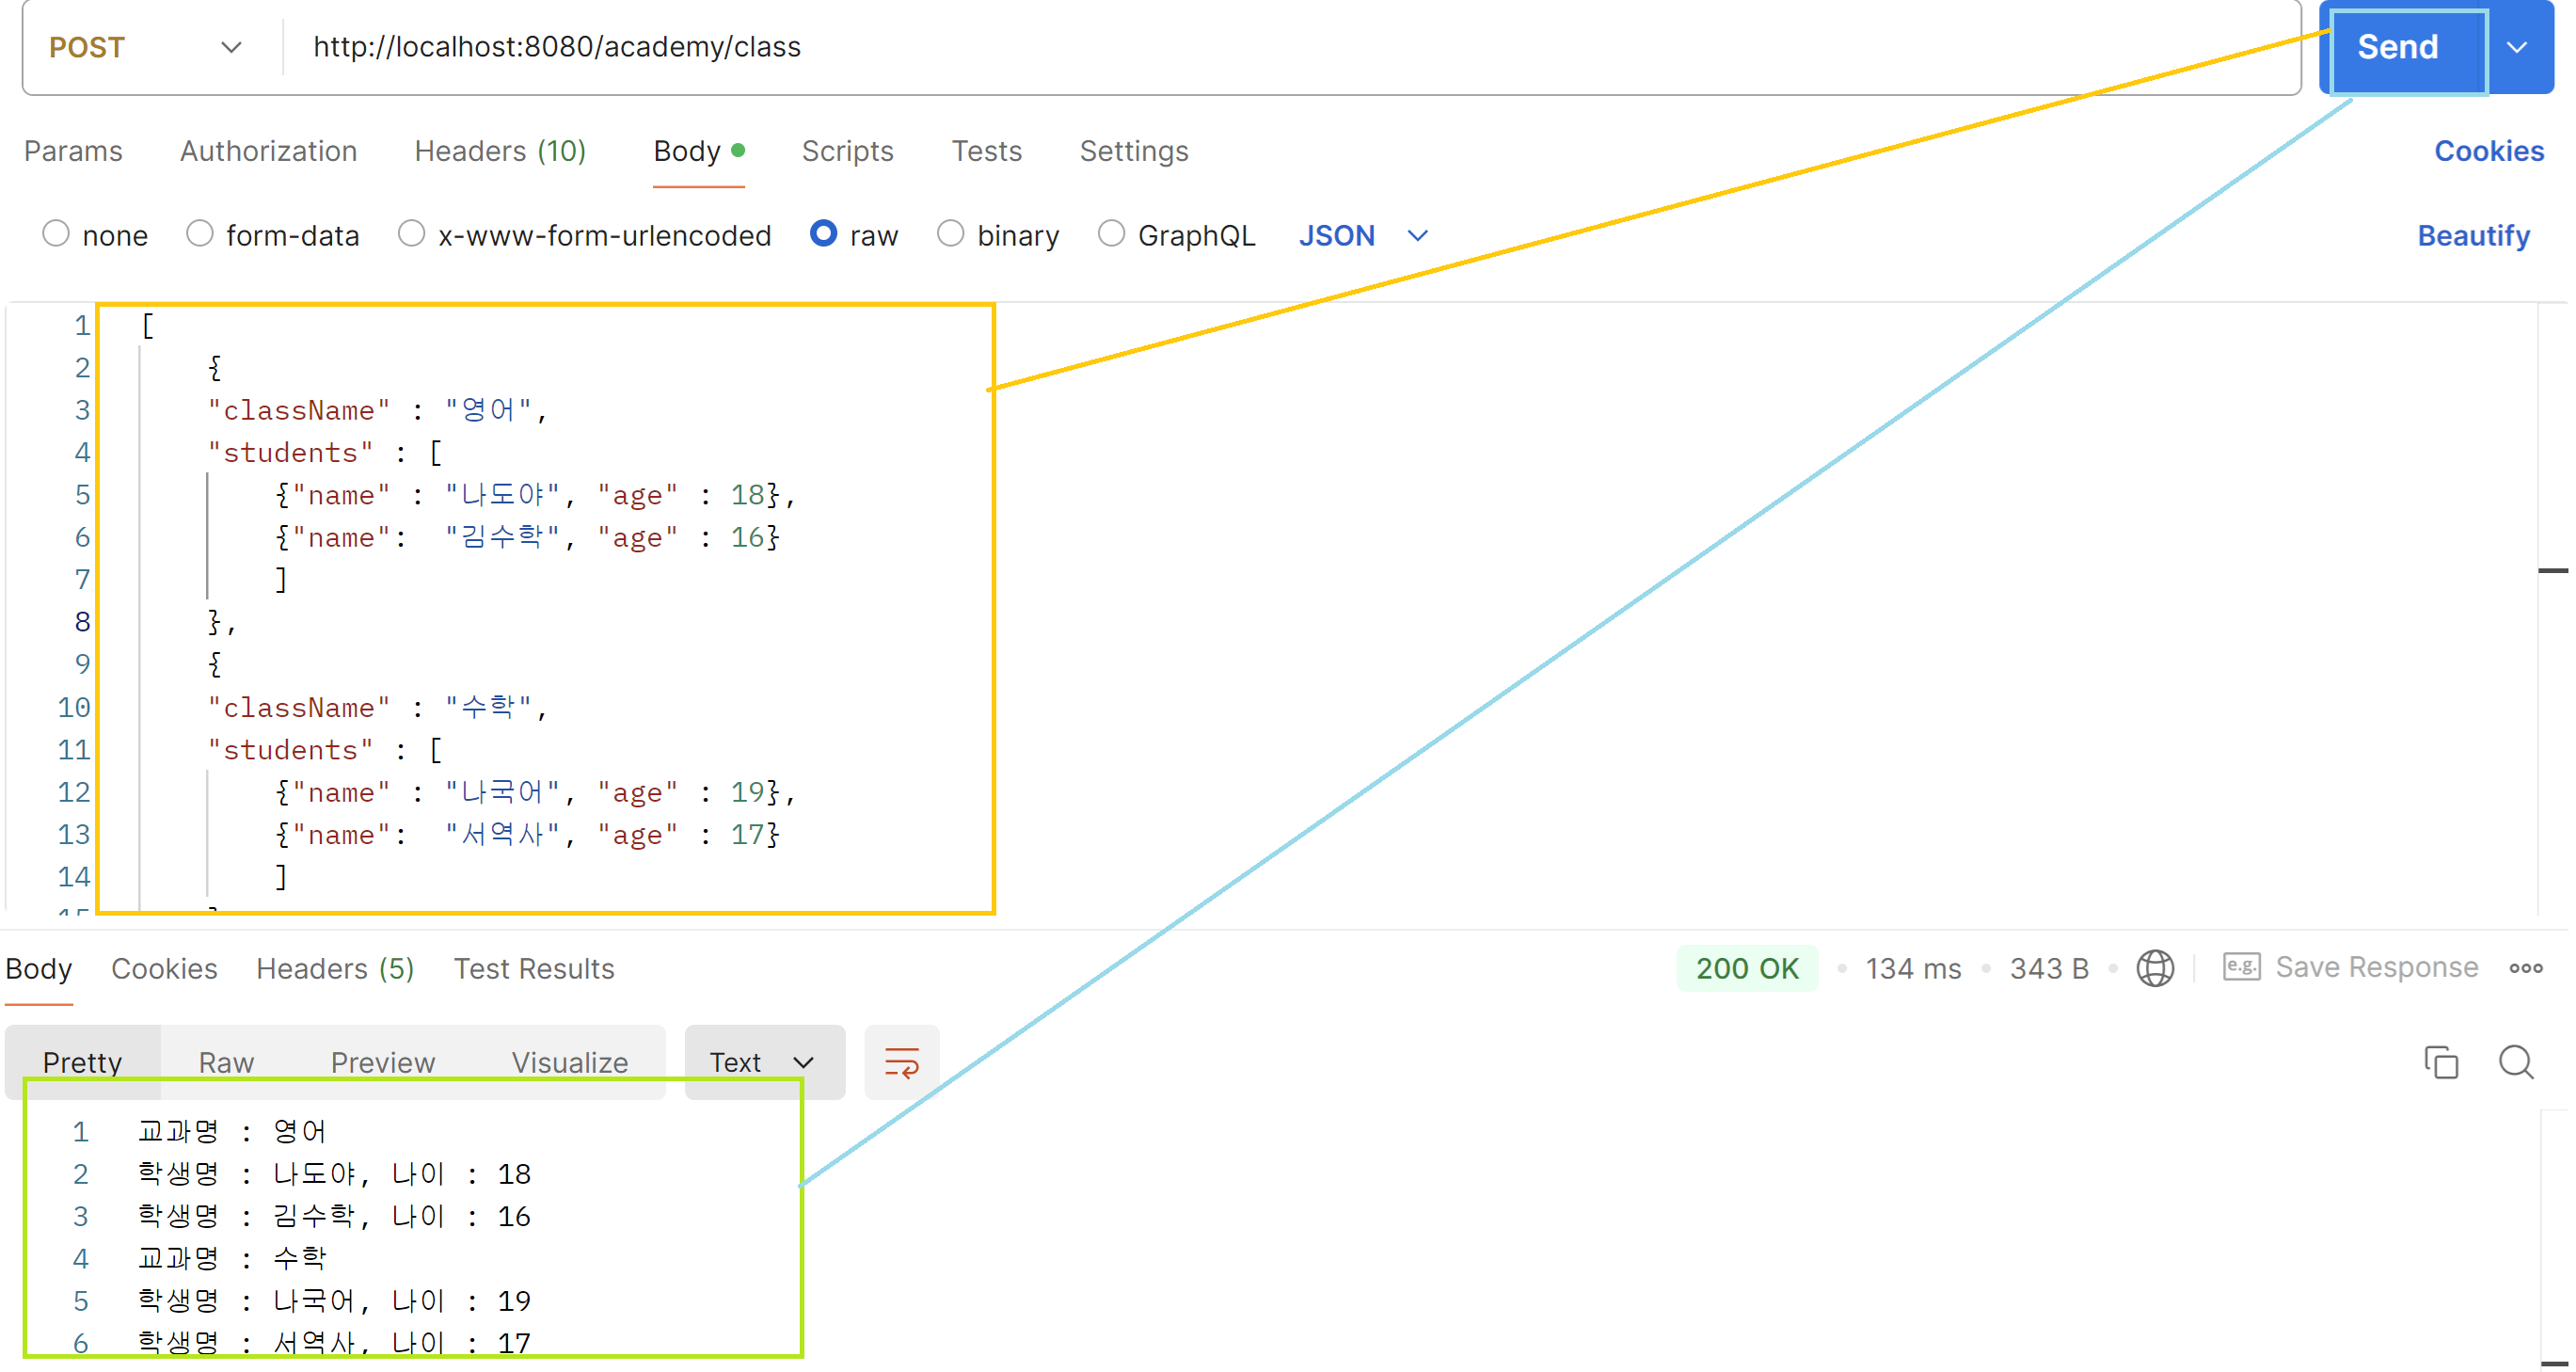
<<JSON 데이터 예제>>
[
    {
    "className" : "영어",
    "students" : [
        {"name" : "나도야", "age" : 18},
        {"name":  "김수학", "age" : 16}
        ]
    },
    {
    "className" : "수학",
    "students" : [
        {"name" : "나국어", "age" : 19},
        {"name":  "서역사", "age" : 17}
        ]
    }
]
1. DTO를 생성한다.
StudentDTO은 학생의 이름과 나이를 포함하고 있다. ClassDTO는 수업이름과 학생목록(StudentDTO를 List형태로 포함)을 포함하고 있다.
//StudentDTO

package com.example.project1.dto;

public record StudentDTO(String name, Integer age) {
}
//ClassDTO
package com.example.project1.dto;
import java.util.List;
public record ClassDTO(String className, List<StudentDTO> students) {
}
2. Controller에서 JSON 데이터를 처리할 로직을 생성한다.
http://localhost:8080/academy/class로 POST 요청을 보내면, 배열 형태로 되어있는 ClassDTO 데이터를 가져와 반복문을 통해 클래스와 학생 정보를 처리하여 응답 메시지를 작성한다.
package com.example.project1.controller;

import com.example.project1.dto.ClassDTO;
import com.example.project1.dto.StudentDTO;
import org.springframework.http.HttpStatus;
import org.springframework.http.ResponseEntity;
import org.springframework.web.bind.annotation.PostMapping;
import org.springframework.web.bind.annotation.RequestBody;
import org.springframework.web.bind.annotation.RequestMapping;
import org.springframework.web.bind.annotation.RestController;

import java.util.List;

@RestController
@RequestMapping("/academy")
public class AcademyController {
    @PostMapping("/class")
    // ClassDTO 인스턴스 배열을 가져올 예정
    public ResponseEntity<String> classstudents(@RequestBody List<ClassDTO> datas){
        //StringBuilder를 통해서 수정가능한 문자열 생성
        StringBuilder responseMessage = new StringBuilder();

        //클래스의 수만큼 배열 반복
        for(ClassDTO classdata : datas){
            String classname = classdata.className();
            responseMessage.append("교과명 : " + classname + "\n");

            // class안에 있는 students 배열 반복
            for(StudentDTO studentdata: classdata.students()){
                String studentname = studentdata.name();
                Integer studentage = studentdata.age();
                responseMessage.append("학생명 : " + studentname + ", 나이 : " + studentage + "\n");
            }
        }
        return new ResponseEntity<>(responseMessage.toString(), HttpStatus.OK);
    }
}
'Backend > Spring' 카테고리의 다른 글
| Spring : HATEOAS에 대해서 (1) | 2024.11.09 |
|---|---|
| Spring : JSON 데이터 처리에 대해서 (0) | 2024.11.03 |
| Spring : @GetMapping에 대해서 (0) | 2024.11.03 |
| Spring : 파라미터를 처리하는 방법 ( @PathVariable, @RequestParam, @RequestMapping ) (0) | 2024.10.27 |
| Spring : Record 클래스 사용하기 (0) | 2024.10.27 |
| Spring : Lombok(롬복)에 대해 알아보자 (0) | 2024.10.27 |
| Spring : DTO(Data Transfer Object)에 대해서 (0) | 2024.10.27 |
| Spring : @Controller 활용하여 다양한 컬렉션 데이터 반환하기 (0) | 2024.10.26 |